Wednesday, August 22, 2012

Roasted Fresh Veggies

Last week my sister and nephew came into town, so the Hubby and I took them to one of the many lakes up here, my mother-in-law was at the cabin, so we had a nice day surrounded by family.  As we were leaving my mother-in-law gave us a bag of fresh veggies which included carrots, two types of potatoes and green peppers.  So when making dinner the other night I knew I had to finish off the vegetables before the went bad so I roasted them in the oven with fresh herbs and olive oil, and can I say, they were great.  Now the recipe I am going to share with you is not very precise because when you have fresh vegetables they are not the same size as vegetables that you get from the store and for the amount of herbs its however you like and feel free to add or subtract herb depending on what you enjoy or don't enjoy.

Ingredients:

1 Green Pepper
2 Red Potatoes
2 Idaho Potatoes
3-5 Carrots, Peeled
1/8-1/4 C Olive Oil
1 tsp. Salt
1tsp. Garlic Powder
1/2 tsp. Onion Power
(I only used the powder because I did not have garlic cloves nor an onion in my kitchen at the time)
handful  mixture of Fresh Basil, Rosemary, and Parsley, chopped.

1.  Preheat the oven to 450 degrees.
2. Wash and chop all of the vegetable, I do the potatoes last.
3.  Mix in the salt, garlic and onion powder, and seasonings.  Stir well and place on a baking sheet and bake for 30-45 minutes, depending on how big you chop your veggies.

 
4.  If you like feel free to stir the veggies half way through the baking time, I don't because I like the crispy sides that come when you let it bake.

The texture and taste was perfection, I even liked having the powders used because it brought a little extra in, that I can not explain.  I urge you to mess around with the amounts and  types of seasoning that you use, possibly trying dehydrated onions or oregano.  If you are looking for a way to have fresh herbs of you own without having to buy them from the grocery store, I started planting my own because it is SOOOOOOOO much cheaper than buying them from the store.


Please make this as a side dish and ENJOY.

Sunday, August 19, 2012

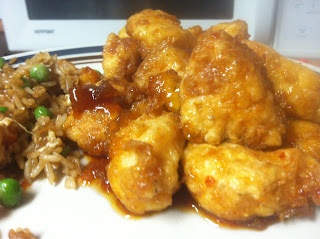
Sweet and Sour Chicken

I LOVE sweet and sour chicken, honestly I am pretty sure I  could eat it everyday.  So when I find a recipe that not only has me making the chicken the way I like it, but also has me making the sauce, I have to try it.  The hubby likes Chinese food, but he is very wishy-washy when it comes to liking it.  Now this recipe does take some time for preparation but the ingredient list is very small and most of them I already had in my kitchen.

Ingredients:

Chicken:
2-3 Boneless Chicken Breasts
1 C. Cornstarch
2-3 Eggs, Beaten
1/2 C. Corn Oil (vegetable oil will work too)
Salt and Pepper

Sauce:
3/4 C. Sugar
4 Tbsp Ketchup
1/2 C. White Vinegar
1 Tbsp. Soy Sauce
1 tsp. Garlic Salt

Directions:
1.  Preheat the oven to 325 degrees.
2.  Cut the chicken into cubes and season with salt and pepper.
3.  Dip the chicken into the cornstarch, and coat them all over, the dip the chicken into the eggs.
4.  Heat the oil in a skillet and cook the chicken until it is browned, but not thoroughly cooked.
5.  Place the chicken on a 9x13 greased baking sheet.
6.  Mix all of the sauce ingredients together and whisk until smooth.
7.  Pour the sauce over the chicken and bake for 45 minutes-one hour.


This chicken is moist and delicious, and the sauce is perfect!  I served this with my fried rice recipe and it was just as good as I find at take-out restaurants.  The only warning I can give you, is when you are baking the chicken to be careful when you open the oven door, the hot vinegar burns your eyes so make sure your are facing away from the oven when you open it.  Other than that, make this and ENJOY!

Wednesday, May 30, 2012

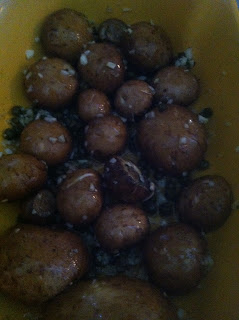
Mushroom Scampi

As I have said in previous posts I have a strange taste in food, since I was a child I have loved mushrooms......I know most kids cringe at the word, but I could not get enough of them.  Lucky for me I found a husband who loves them as much or more than I so I can make things like mushroom scampi for an appetizer and it will actually get eaten.  This recipe is very similar to a shrimp scampi but obviously with mushrooms and a couple other differences.

Ingredients:

1 lb. Mushroom Caps
3 Large Garlic Cloves, Minced
2 Tbsp. Whole Balsamic Capers
2 Tbsp. Olive Oil
1/4 Cooking Sake
3 Tbsp. Butter, cut up
2 tsp. Lemon Juice
1/4 C. Fresh Parsley

Directions:

1. If needed slice the stems off the mushrooms and place in a shallow baking dish.
2.  In the baking dish add the capers, garlic, olive oil, and sake and mix until well coated.
3.  Once mixed well, place butter on top and bake at 450 degrees for 7.5 minutes.
4.  Take dish out of the oven and stir the mushrooms, then put it bake in the over for another 7.5 minutes.
5. Take dish out of the oven, then stir in the lemon juice and parsley and serve.

This appetizer is great with some crusty bread, personally I go and get some from this awesome sandwich place we have here called Grand Junction (if you are ever in Fargo, ND make sure you stop at a Grand Junction). If you even semi like mushrooms this appetizer is for you it is simple and fresh tasting


Enjoy

TaterTot Hotdish

I have lived in many different places in the U.S. including Pennsylvania, California, Minnesota and North Dakota, and it was not until I moved to the Midwest did I hear of a "hot dish" and for all of you out there who have no idea what a hot dish is, it is simply a casserole.  If I had ever had this dish before moving here I would never call it a hot dish but since I did not I will use the mid-western terminology. The reason I enjoy this meal so much is for the simple fact that it is all in one dish and I can simple slap it together with out thinking much and you can improvise and it still taste good.  When making this I use canned vegetables so whatever I have in the pantry is what is going in.  Although the hubby and I do prefer green beans and creamed corn.

Ingredients:

1 lb. Ground Beef
1/2 Onion Chopped/ or handful of Chopped Dried Onion
1 Can Cream of Mushroom Soup
1 Can Cream of Chicken Soup
1 Can French Cut Green Beans, Drained
1 Can Creamed Corn
1 Bag Frozen Tater Tots

Directions:

1.  Preheat the oven to 375 degrees.
2.  In an oven safe dish spread the ground beef evenly over the bottom.
3.  On top of the beef, spread the onions and then the cream of chicken soup.
4.  Then spread the vegetables on top.
5.  Place the tater tots on top in a single layer and then spread the cream of mushroom soup.
6.  Bake for 55 minutes and then let sit for 5 minutes before serving.

Honestly this is a simple meal that will please not only yourself but the whole family, even the kids.  This dish is one that will help clean out your pantry, so I like making it when ever I feel I am getting too much stuff in there.


Enjoy

Sunday, May 20, 2012

Pesto Stuffed Shells

Since I have started this blog I have made this meal twice, which I have not done with any other dish.  So, obviously its good.....really, really good!  Its creamy and flavorful and oh so tasty! It uses a prepared pesto and I have used a different brand of pesto each time, both were great but the Hubby preferred the Classico brand, it is bigger and cheaper than the other brands that are offered at our grocery stores. The awesome thing about this meal is that you can make a part of it the day before and have it ready for the next day.  I pre-cook the chicken and shred it the night before, that way, dinner the next day doesn't take that long, and after a long day of work the easier the better for meals.

Ingredients:
16 Jumbo Pasta Shells
4oz. Cream Cheese, Softened
1 C. Grated Parmesan Cheese
1/4 C. Mozarella Cheese
3 Heaping Tbsp. Prepared Pesto
4 Chicksen Breast, Cooked and Shredded
2 -3 Cloves of Garlic, Minced
Pasta Sauce

Directions:
1. Cook and shred the chicken, I use a trick that I have previously mentioned in the "Green Enchiladas" post where I put the hot cooked chicken in my kitchen-aid stand mixer and mix, it shreds perfectly.
2.  Cook the pasta shells as directed, drain and set aside.
3.  In the stand mixer, mix the chicken, cream cheese, mozarella cheese, parmesan cheese, pesto and garlic.


4.  Fill each shell with the chicken mixture and arrange in a 13x9 pan.  Once the pan is filled spoon pasta sauce on top and spinkle with mozarella cheese.


5.  Bake the shells at 350 degrees for 30 minutes.

This dish is so yummy, I have them for lunch for the next two days and never tire of it....always a good sign. This meal is a crowd pleaser and does not take too much time to make, so you can still have a night, which is what I love about it!

Tip: add more or less garlic depending on what you like, I LOVE garlic and I add three cloves, there is some garlic in the pesto so start with adding one clove and see how you like it.


ENJOY


Wednesday, May 9, 2012

Best Garlic Bread...EVER!

So I searched all over the internet today to find the "perfect" garlic bread recipe...all I could find was garlic bread with cheese on top, which by the way is cheesy garlic bread not garlic bread (really annoying to search the internet for garlic bread only to come up with cheesy)  So I took a little from one recipe and a little from another to make what sounded like perfect garlic bread....and I found it!!!!!!!!! This is simple and most of what this recipe calls for I already had the only part I did not have was the bread, not that all of you will have everything needed but none of what is called for hard to find/get. To start with get a loaf of french bread!

Ingredients:

 1 loaf French Bread, sliced in half
5 Tbsp. Butter, at room temp.
2 tsp. Olive Oil
3 Garlic Cloves Crushed
1 tsp Dried Oregano
1 Bunch of Chives, chopped
Salt and Pepper, to taste

Directions:

1.  Preheat the broiler.
2.  Slice the bread horizontally and place on a baking sheet.
3.  Mix the rest of the ingredients together until smooth.
4.  Spread the mixture on the bread, and place under the broiler and broil for about 4-5 minutes, checking often.


Tip:broil the bread just before you want to eat, it cools quickly and it tastes soooooOOOooo good when it hot.  I honestly have never had better garlic bread in my life, and that includes in restaurants! Feel free to add more or less garlic, depending on how much you like garlic.  Next time you need a nice and delicious side, please make this and you will want to make it for every meal after that!


ENJOY

Monday, May 7, 2012

Orange Steak w/ Fried Rice

I love all sorts of food, I am a picky eater, but I like foods from all over the world.  I have opened my hubby's eyes to world of food and it has been so much fun watching him become more adventurous than I. This dish is one of our favorites and you can interchange chicken for the steak if you prefer.  The reason I love this is because there are very few ingredients and it takes little time to make.

Orange Steak:

1 lb. Steak, thinly sliced
1 1/2 C. Light Asian Toasted Sesame Dressing
1 1/2 C. Orange Juice
1 bag of Asian Vegetable Medley
1 Tbsp. Vegetable Oil


Directions:
1.  Heat a deep pan over high heat, put oil in the pan and let heat up,  once the pan in hot stir fry the steak for about 5 minutes.


2.  Once the steak is pretty much cooked through, add the juice and dressing and vegetables, let simmer for about 7-10 minutes.


Fried Rice.


2 C. Cooked Rice
1 C. Frozen Peas and Carrots Mix
2 1/2 Tbsp. Soy Sauce
2 Eggs
2 Tbsp. Vegetable Oil
1/4 C. Green Onions


1.  Preheat the oil in a pan over medium heat,rice and stir  rice begins to brown.


2.  Add soy sauce and vegetables, cook for about 2-3 minutes.


3.  Make a hole with the rice and vegetables in the middle of the middle of the pan, crack an egg then stir it until the egg is fully cooked, add the second egg and do the same.


4.  Add the onions and cook for about 1 minute, then serve.


I could eat the fried rice all by itself as a meal it is so tasty, and even if you do not like onions, please try some in the rice, it adds a nice flavor.   To save yourself some time, you can make the rice the night before and refrigerate it, it makes no difference to the taste or consistency to the fried rice.


ENJOY!

Easy Grilled Teriyaki Chicken and Fresh Green Beans


 As I have posted before I am a huge fan of ways to make my life more simple, and instant/prepared things, so for this meal I bought store bought teriyaki sauce and marinated chicken breasts for about 45 minutes.  My hubby helped with cooking since really the grill is his domain.  I made rice using  my rice cooker with one cup of rice, one cup or water and 2 Tbsp. of butter.  After taking the chicken out of the marinade I left a little in a dish to baste the chicken with and let the hubby do his thing. With the rest of the marinade let it boil in a pot while whisking, serve it over the rice and chicken. What I did make from scratch was the green beans, the hubby and I are huge into vegetables and so be warned we make a lot at a time.


Ingredients:
1 lb Fresh Green Beans
I Tbsp. Butter, divided into four squares
1 Tbsp. Dehydrated Chopped Onions
1 tsp. Garlic Powder
1/2 tsp. Onion Powder
Salt and pepper to Taste.

Directions:
1.  Wash and cut off the ends of the green beans.
2.  Steam the beans over a pot of boiling water about 1 inch deep, steam for about 7-10 minutes, the beans will turn a bright green color.
3.  Meanwhile place the butter and seasoning in a bowl, once the beans are steamed properly place them in the bowl and toss.


Towards the end of the grilling process place some pineapple rings on the hot grill and let the sugars caramelize. Put everything on a plate and eat, the chicken, pineapple and rice go so well together!


ENJOY!

Liz's Perfect Pork Chops

Sometimes I read blogs or posts about all the things people make and how they seem to spend so much time in the kitchen how could they possibly have a life, sometimes I even feel bad because I tend to cut corners, I use prepared/ instant things a lot, they make life so much easier and honestly who has time to prepare a full meal from scratch (definitely not me).  I am going to be honest with all of you, I probably use at least one prepared/instant item in everymeal that I make.  Tonight's dish is no exception, I made a quick seasoning rub for my pork chops and a simple mashed potato recipe, and yes an instant pork gravy mix....gasp!  This is a simple and easy pork chop recipe that I can easily make after working a 9 hour shift.

Pork Chops:

Ingredients:
3-4 Pork Chops
2 Tbsp. Butter
1/2 tsp. Salt
1 tsp. Garlic Powder
1/2 tsp. Onion Powder
1/2-1 Tbsp. Rosemary
1 tsp. Ground Pepper

Directions:
1.  Set a pan over high heat and let the butter melt.  Preheat the oven to 300 degrees.
2.  Meanwhile mix together the seasonings and sprinkle over the pork chops and rub it in.


3.  Once the pan is hot, place the chops in and sear for about 5 minutes on each side.
4.  Place the chops in a oven safe dish and cook for about 30 minutes.


Mashed Potatoes:

Ingredients:
4 Potatoes (Rule of thumb is 2 potatoes per person you are cooking for)
2 Tbsp. Butter
1/4 C. Half and Half
1 tsp. Italian Seasoning
1/2 tsp. Garlic Salt

Directions:
1.  Chop up potatoes into smaller pieces and place in a pot of boiling water, boil until the potatoes are fork tender (you can place a fork into the potatoes and it does not stick, they just fall apart).
2.  Once the potatoes are cooked, drain them and place them in a mixing bowl with the rest of the ingredients, blend until smooth.  Feel free to add more half and half until you get the desired consistency.


As I was mixing the potatoes I mixed together the gravy mix, it only takes about 2 minutes to make and honestly it is pretty tasty so why not use it,  granted I did add some ground pepper.

Place all on your plate and enjoy, such a tasty meal with out all the hassle of having to suffer  in the kitchen all night. 


ENJOY!

Monday, April 23, 2012

Brown Sugar Glazed Salmon

As I have stated before I am not a fan of fish, my husband has been trying for years to get me eat more fish and just lately I have come to appreciate some fish.  Salmon is one of those fish that can be really good or easily ruined, which is why I have been fearful of attempting to make it.  When I saw something about brown sugar and fish, I thought how can I go wrong? Who does not like brown sugar?  This glaze makes a nice crust on the salmon and it cooks in under 10 minutes.  Ohhh my this fish is so flakey and delicious!

Ingredients:
4 (4oz) Salmon Fillets
3 Heaping Tbsp. Brown Sugar
1 Tbsp. plus 1 tsp. Grated Ginger
1 Tbsp. Dijon Mustard
2 tsp. Soy Sauce

Directions:
1.  Whisk together the brown sugar, grated ginger, dijon, and say sauce.
2.  Preheat the oven to broil and line the broiler pan with aluminum foil, then spray with cooking spray.
3.  Place the salom on the foil and spoon the glaze over each fillet.
4.  Broil the fillet's for 5-7 minutes 6 inches away from the heat.


This is such a tasty dish, if you are not a fan of the taste of ginger, feel free to to lessen the grated ginger.  My hubby and I both love ginger so I added all of it, if you are not sure where to find ginger it should be in fresh vegetables section, it is a root.  I used frozen fillets that come in perfect portions, you can use fresh fish as well and I plan on using fresh fillets next time. 


Please, make and ENJOY!

Fresh Strawberry Pie

 Get ready to thank me! Get ready to sing my praises! I am about to show you a recipe for a delicious strawberry pie that will knock your socks off.  I am telling you this pie is refreshing and light and will make you dream of  summers at the lake (or a beach, if you are lucky). For this recipe you can make your own pie crust, which consists of crushed graham crackers, butter, and sugar, for this time making it (and there will be more times and for that I am sure) I used a premade crust.  I bought 1 lb. of strawberries and got this awesome strawberry huller, which if your family likes strawberries its deffinitely a good buy.

Ingredients:
1 C. Sugar
1 C. Water
3 Tbsp. Strawberry Gelatin
1 lb. Fresh Strawberries
3 Heaping Tbsp. Cornstarch
1 Pie Crust

Directions:
1.  Mix together the cornstarch, dry gelatin, and sugar.
2.  Add the water and cook over medium heat, constantly stir until the gelatin becomes thick and clear.  Once the mixture becomes thick, remove it from the heat and let it cool.
3.  Meanwhile wash, hull and half the strawberries, then arrange them over the pie crust.
4.  Once the gelatin mixture is cooled, pour it over the strawberries and let the pie chill in the refigerator.


This pie get better and better the colder it gets.  For those of you who are not the biggest fans of Jello, either is my husband and I promise he was in love with this pie and has already asked me to make it again (we haven't finished the current pie).  Its sweeter and thicker than normal jello and trust me much tastier too.  This pie tastes like you put hours of work into into it, which you don't need to.  Please once this summer make this pie and serve it with some whipped cream.


ENJOY!

Wednesday, April 11, 2012

Ketchup and Diet Coke Chicken

I have a crazy hectic week this week, so I have been making meals that don't take too much prep work and/or ingredients.  The name of this chicken might not sound so appetizing, trust me the first time I heard about it, my face curled up and I was ready to never, ever, try it.  But a woman I work with kept pushing that it was some of the best chicken she ever had and that it is the one dish she makes that her husband keeps asking for.  There is nothing else to this dish except for what is in the title, you may want to add some veggies and serve it with some rice, but there are very few ingredients that are needed.  The chicken is so tender I could cut it with my fork and there was so much flavor I could not believe it.

Ingredients:

4 Chicken Breasts
1 Can of Diet Coke (do not use regular Coke)
1 C. Ketchup

Directions:

1. Whisk together the Diet Coke and ketchup and then pour chicken breasts in a baking dish.
2.  Cook the chicken at 350 degrees for about 40-60 minutes depending on the size of the chicken breasts.
3.  If you are serving this with rice, cook the rice and once the chicken is done, bring the sauce to a boil in a sauce pan and let it boil for 2 minutes.


Honestly I can not stop praising this dish, I tell everyone who asks me for dinner ideas about this, and most of them are interested because they already have the ingredients.  The sauce tastes like barbecue sauce without having that stickiness and thickness that barbecue sauce has, plus there is no basting required, just place the baking dish in the oven and let it cook.  No muss no fuss.....the best kind of dinner.  Please try this chicken and tell your friends!

ENJOY!

Sunday, April 8, 2012

Two-Tone Pasta

Ok, I know that more often than not I make things that have a lot of prep time or cooking time.  I usually am cooking on the weekends and have more time than on a weeknight, but I still do cook on weekdays and there are times when I have plans or just things I need to do, so one recipe that I use when I know there is going to be one of those nights ahead is this quick and easy meal to plan.  I even use pre-made frozen breadsticks to add something to the meal, they only cook for about 10 minutes and usually taste great.

Ingredients:
1.5 lb Ground Beef
1 jar Tomato Sauce
1 jar Alfredo Sauce
1 lb Uncooked Pasta

Directions:

1.  Cook pasta as directed.
2.  Cook ground beef until no pink is left, add both the tomato sauce and Alfredo sauce and let simmer for about 5-10 minutes.


I add  seasoning to the sauce as well, usually garlic powder, pepper, rosemary, sage, and  oregano. you can add to these are not use them at all.

Honestly this meal is simple and tasty.  I can have this meal done and being eaten in less than 30 minutes, which is really nice when you live as busy a life as the one that I do.  Please make this and see how easy this is.


ENJOY!

Monday, March 26, 2012

Emily's White Chocolate Fondue

A couple of years ago I went to visit my sister in California, when I was there she made this amazing white chocolate fondue, she picked our favorite fruit and add a few things that she knew would be awesome, and I must say this is simply delicious.  I have made this in a fondue pot and in a regular pot over the stove.

Ingredients:

1 Bag of White Chocolate Chips
1/4 Cup Milk
1 Shot Amaretto Liqueur

Directions:

1.  Combine the chips and the milk.
2.  Set over low heat stirring constantly.
3.  Once the chips are melted stir in the amaretto and let cook until the alcohol is gone, about 1-2 minutes.
4.  Serve with your favorite fruit or other desserts.


This is such a fun dessert, it also is one that can please most people because they can choose the amount of fondue on each piece.  My sister used strawberries, bananas, brownie pieces, and rice krispie treats.  This recipe is sooooooo tasty, I dare you to find anyone who like sweets, that does not like this.


ENJOY!